Hello my crafty friends
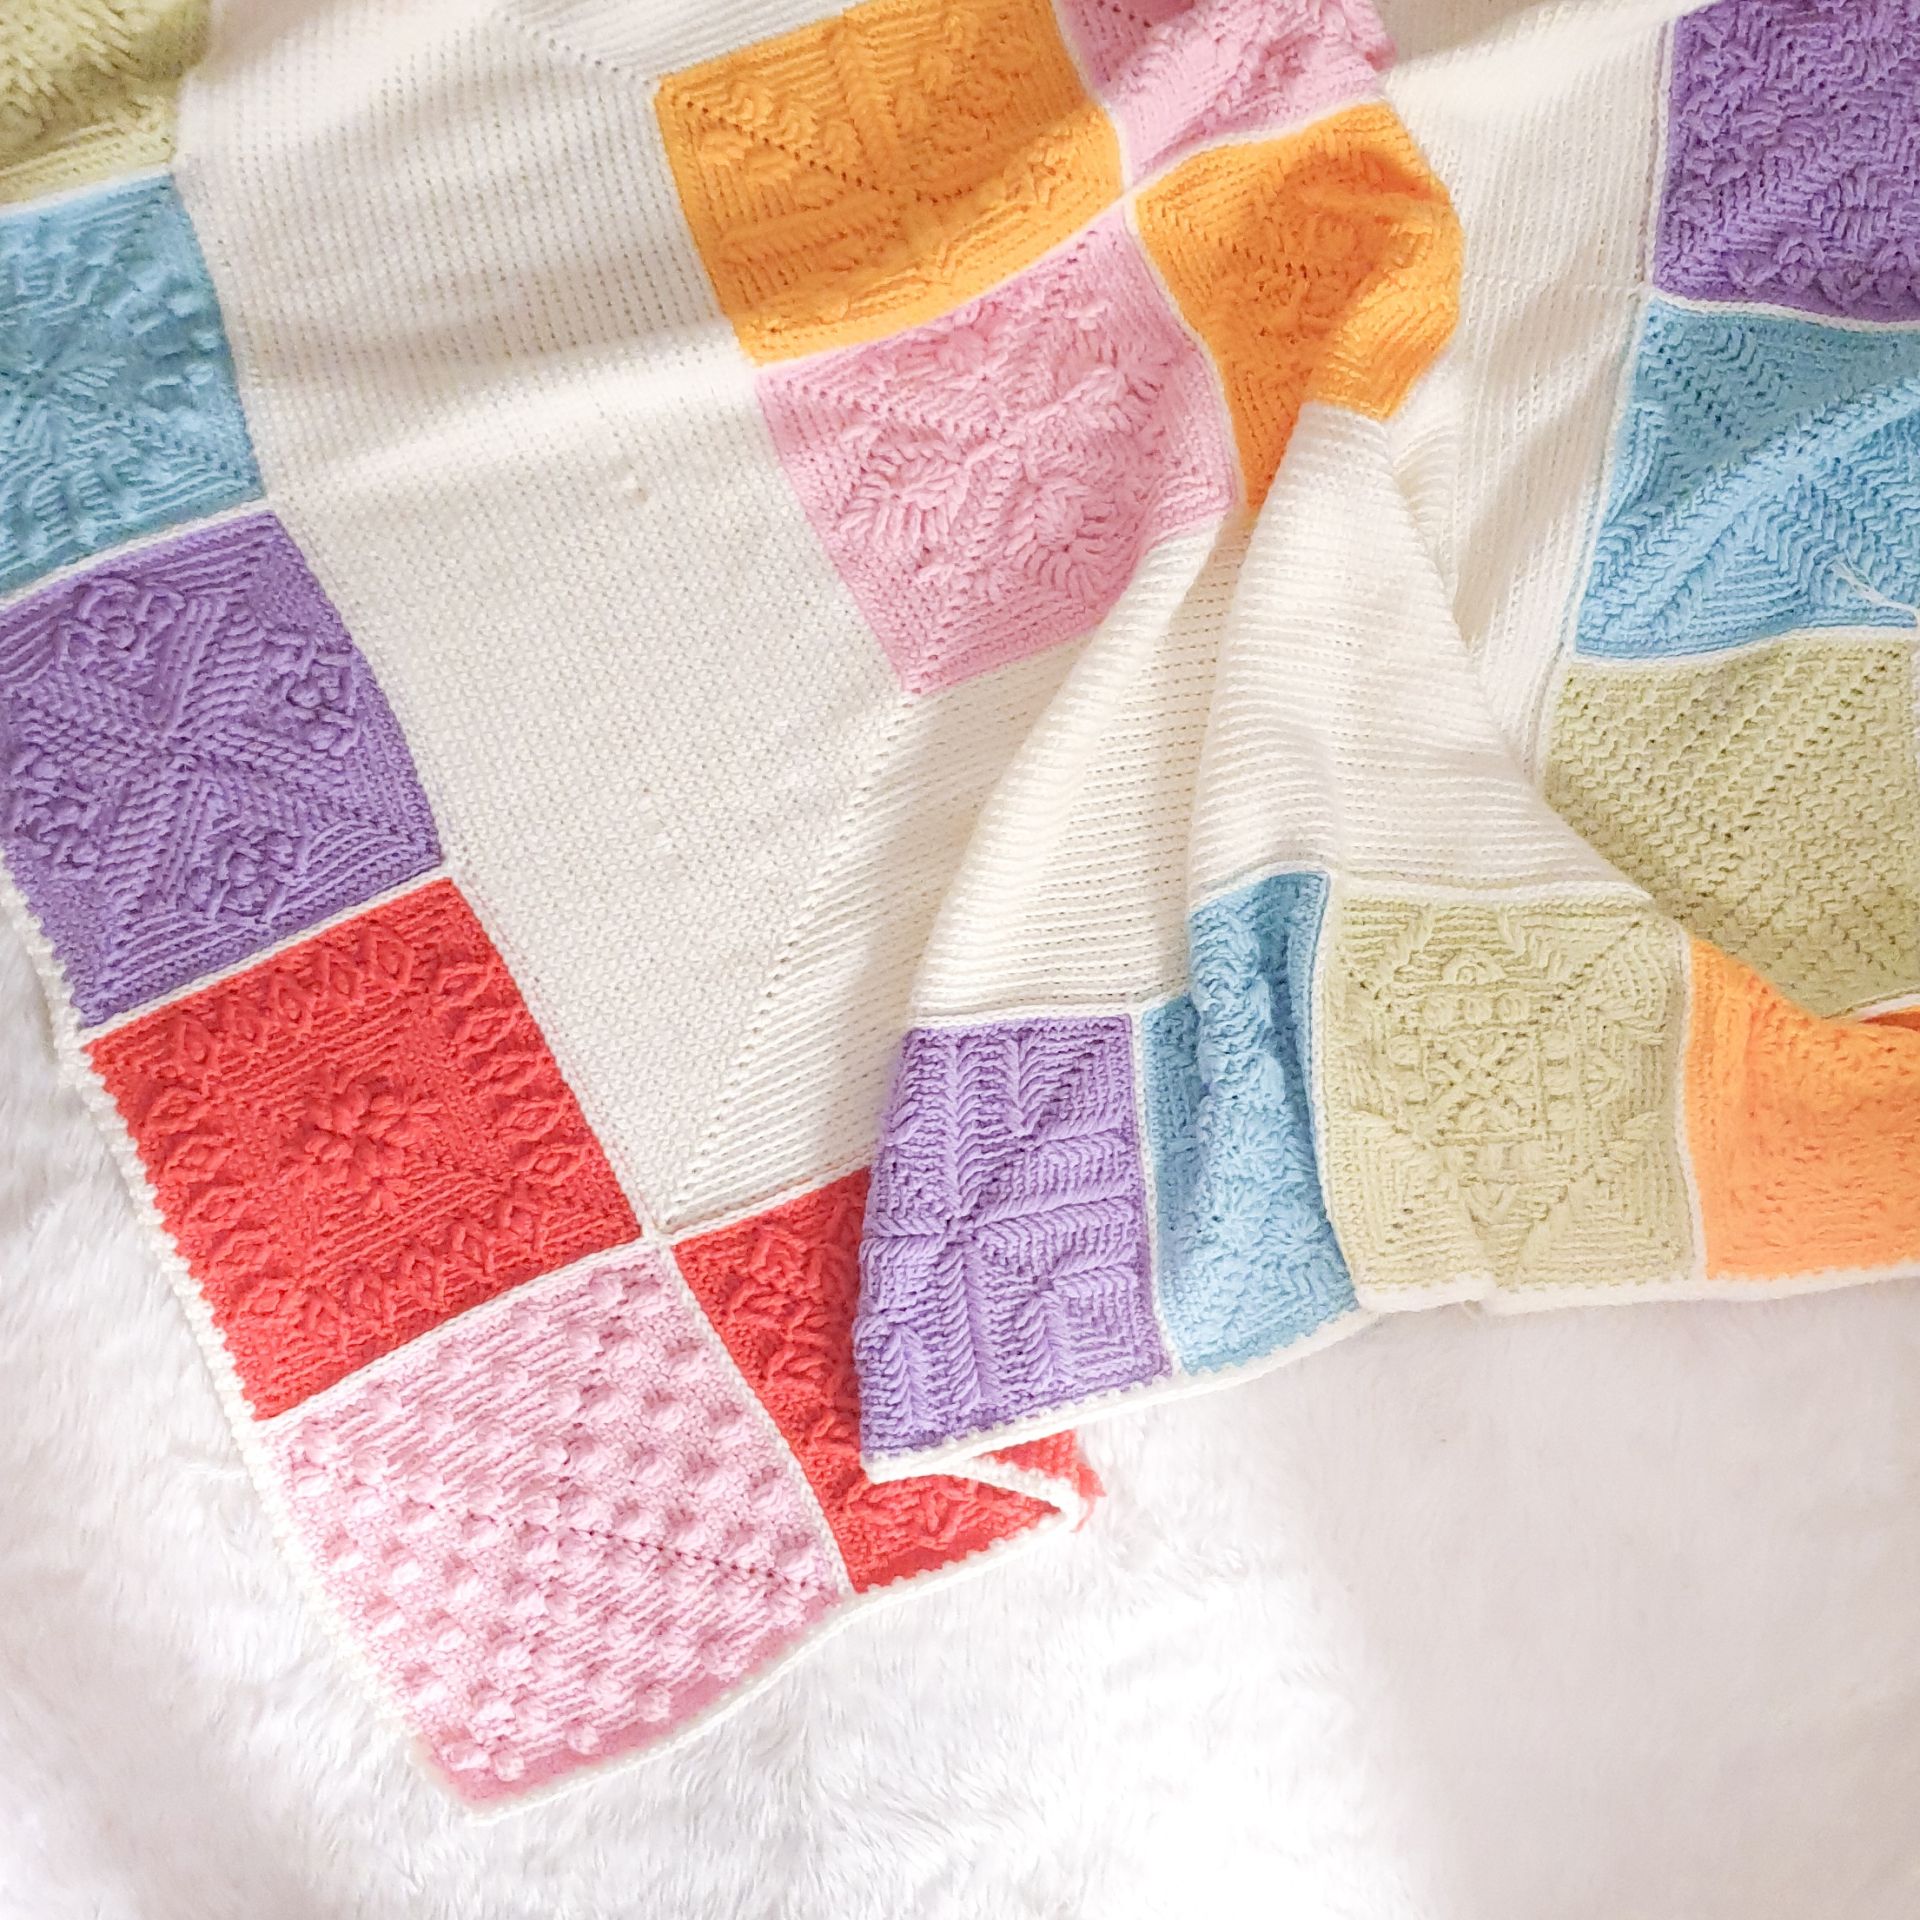
Today I’m so happy to share with you the details of my own design for the famous Stardust Melody project, designed by Polly Plum, and this is her blog. You can read all the details on how to make the project’s squares and watch the videos on her YouTube channel
In this post I’ll share how I designed these squares and arranged them in a special way that’s different from the usual one
Topics:
Project details and the quantities I used
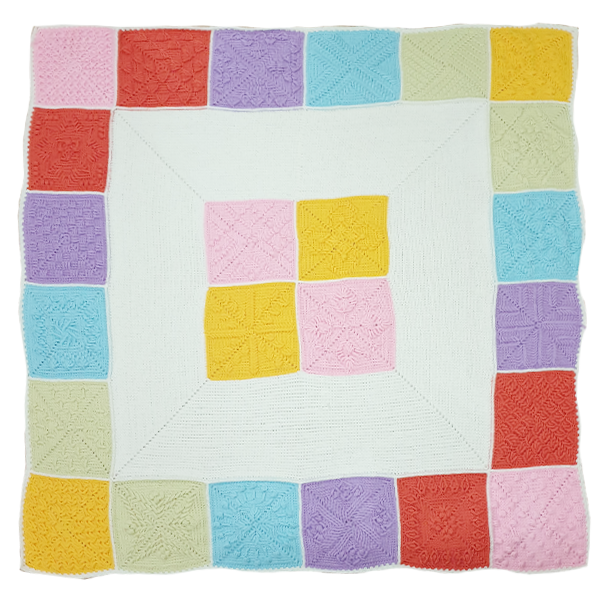
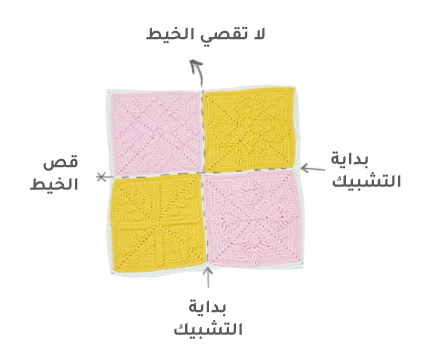
How to arrange the squares
How to join the squares
How to crochet the inner white frame
How to attach the piece to the frame made of the project squares
How to crochet the final border
Project details and the quantities I used
Number of squares in each color = 4 squares
Total number of squares = 24 squares
Finished blanket size: 175 cm × 175 cm
Step by step
- How to arrange the squares
- How to join the squares
To join the squares in general, I used the back loop join method
and this video explains the method in detail
- Join the four squares in the middle together; the rest of the squares will only be joined as a frame
- How to crochet the inner white frame
After joining the four squares in the middle, you’ll make a white frame by following these steps
- Round 1 of this frame starts in the middle, where the two squares meet, as shown in the previous picture
Work 1 sc in the back loop of each stitch of the round
In the corners, make a corner as usual, which is 1 sc, 2 ch, 1 sc
In the joining area, where the two squares meet, do the following
sc in the corner space before the join, sc in the joining stitch, sc in the chain space after the join
After finishing the whole first round, make a turning chain, then sc in the back loop of each stitch of the round and a corner in each corner of the round; keep repeating until you have 35 white rounds in total - How to attach the piece to the frame made of the project squares
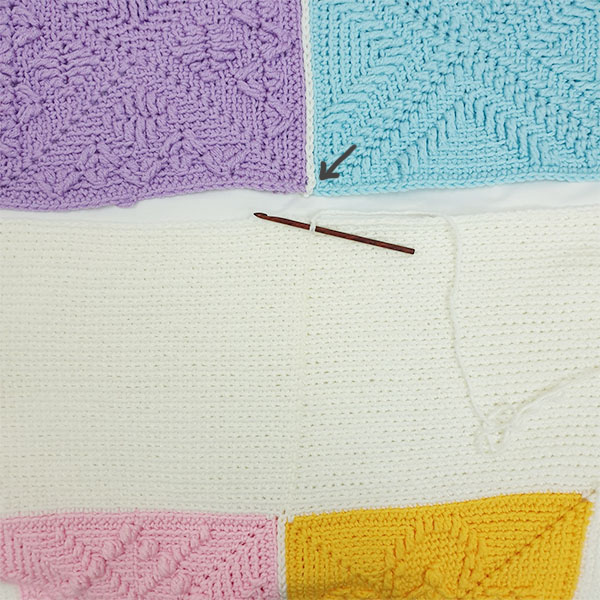
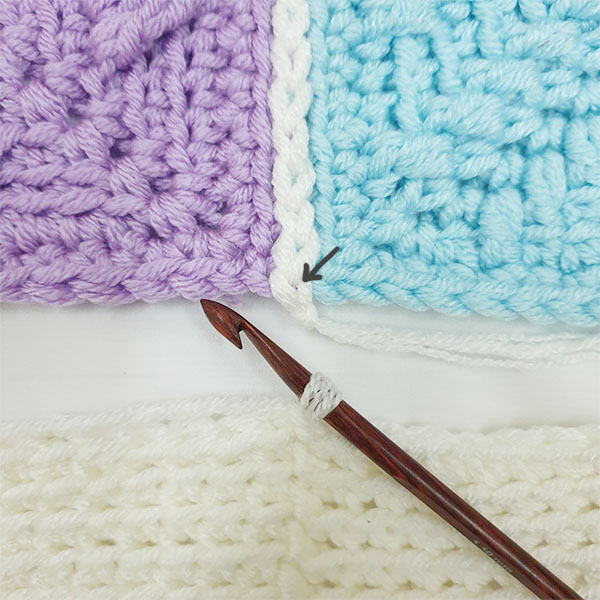
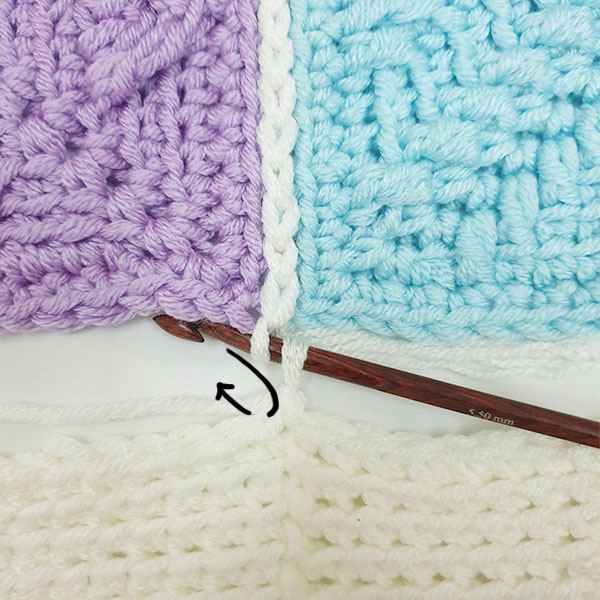
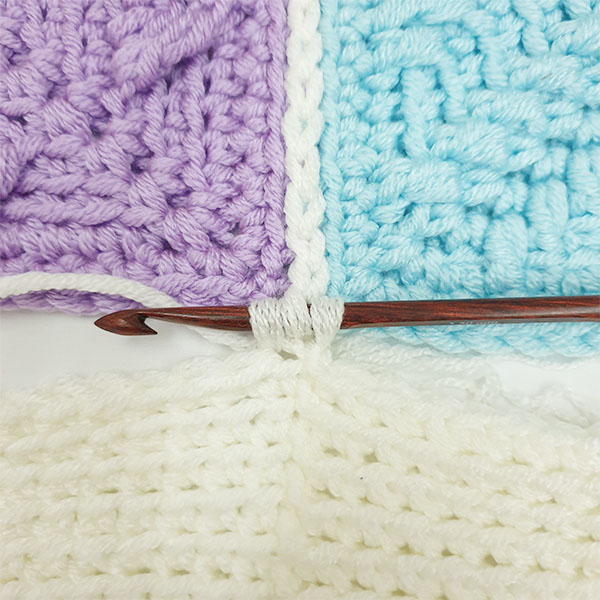
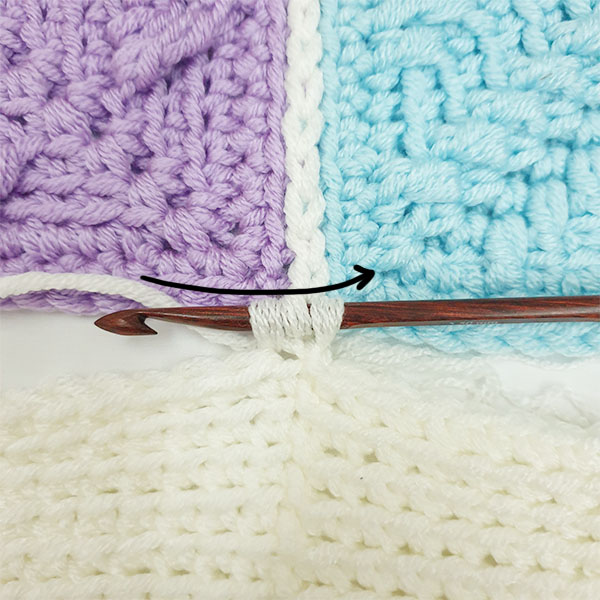
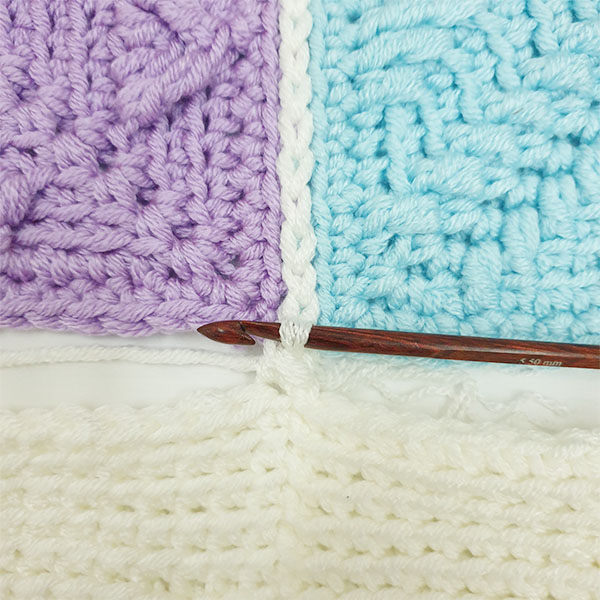
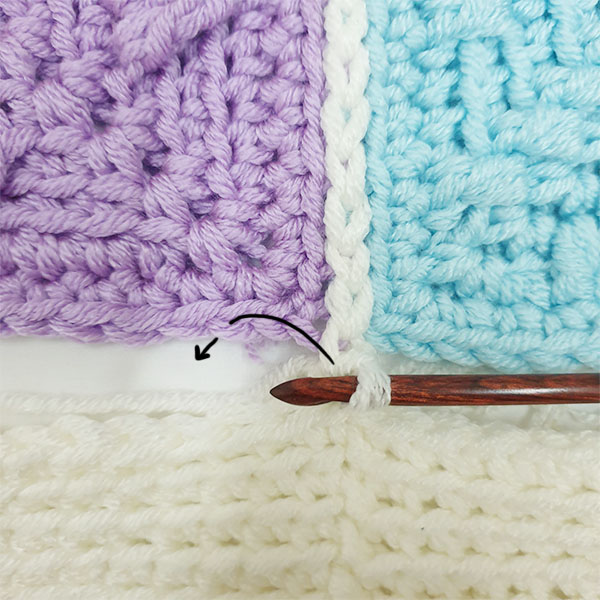
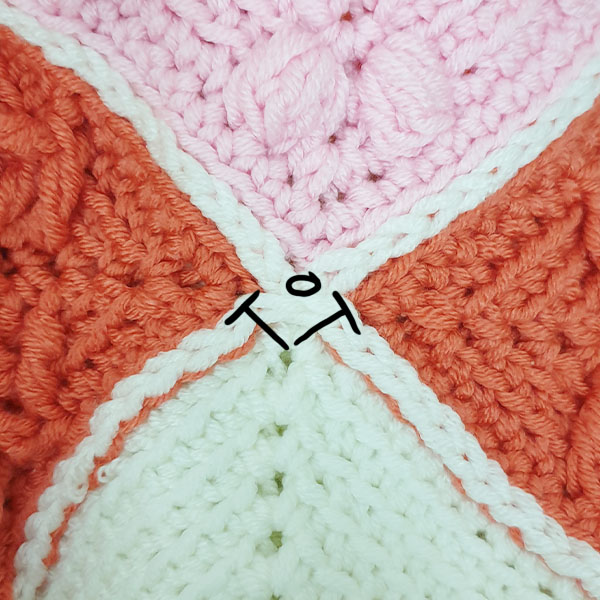
- Repeat the previous steps until you reach the corner, then follow the pattern shown in the picture to join the corner
- How to crochet the final border
For the border I went with a simple design so it doesn’t overpower the blanket’s details, and kept it to just two rounds using the
Moss Stitch
How to:
Join the yarn in any corner with a standing sc, then 2 ch, then sc again in the same corner
sc in the next stitch right after the corner
ch, then skip a stitch, then sc in the stitch after it
Repeat the last step to the end of the side; before the corner make a sc, then a corner as explained before
Repeat the steps to make the second round, cut the yarn and weave it in
The end
If you make the same design, please tag my account on the photo when you post it, along with a mention. Thank you all, and see you in upcoming projects!