Welcome, my crafty friends, I hope you’re all doing well
It’s been such a long time since I last wrote a post..
I’ve missed you and I’ve missed making things by hand
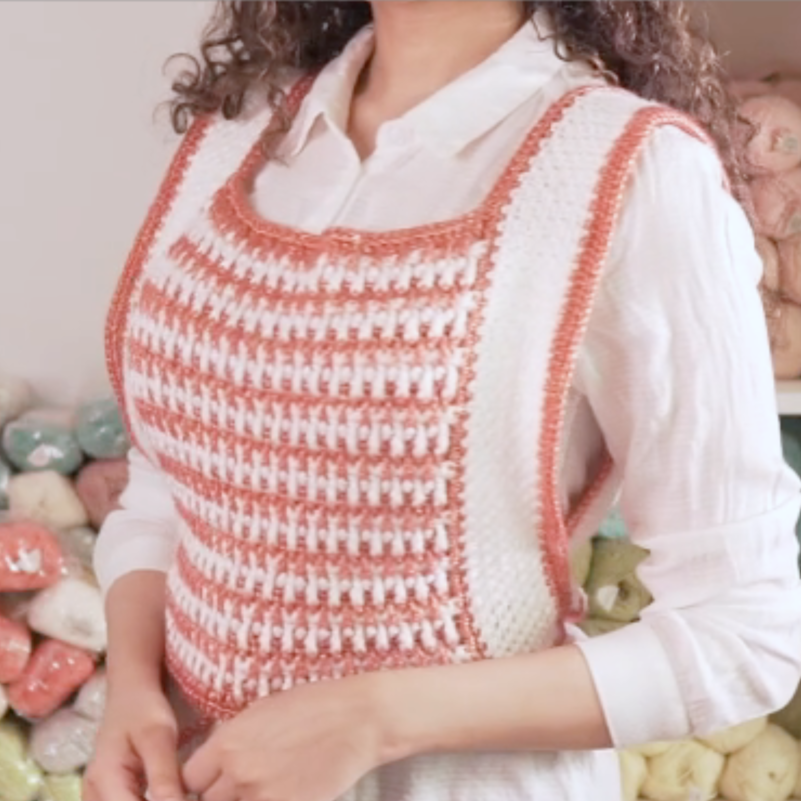
Today I’m back with a new pattern inspired by a piece I saw online and loved
and I wanted to make one like it and share the pattern with you
I saw the original piece at The Easy Design
Of course I filmed a video of it for YouTube, but the video doesn’t have a lot of explanation
just the important things that are hard to explain in writing… and the full pattern is written in this post
I really believe that written patterns are better and easier to go back to, and you can print the pattern and follow it easily
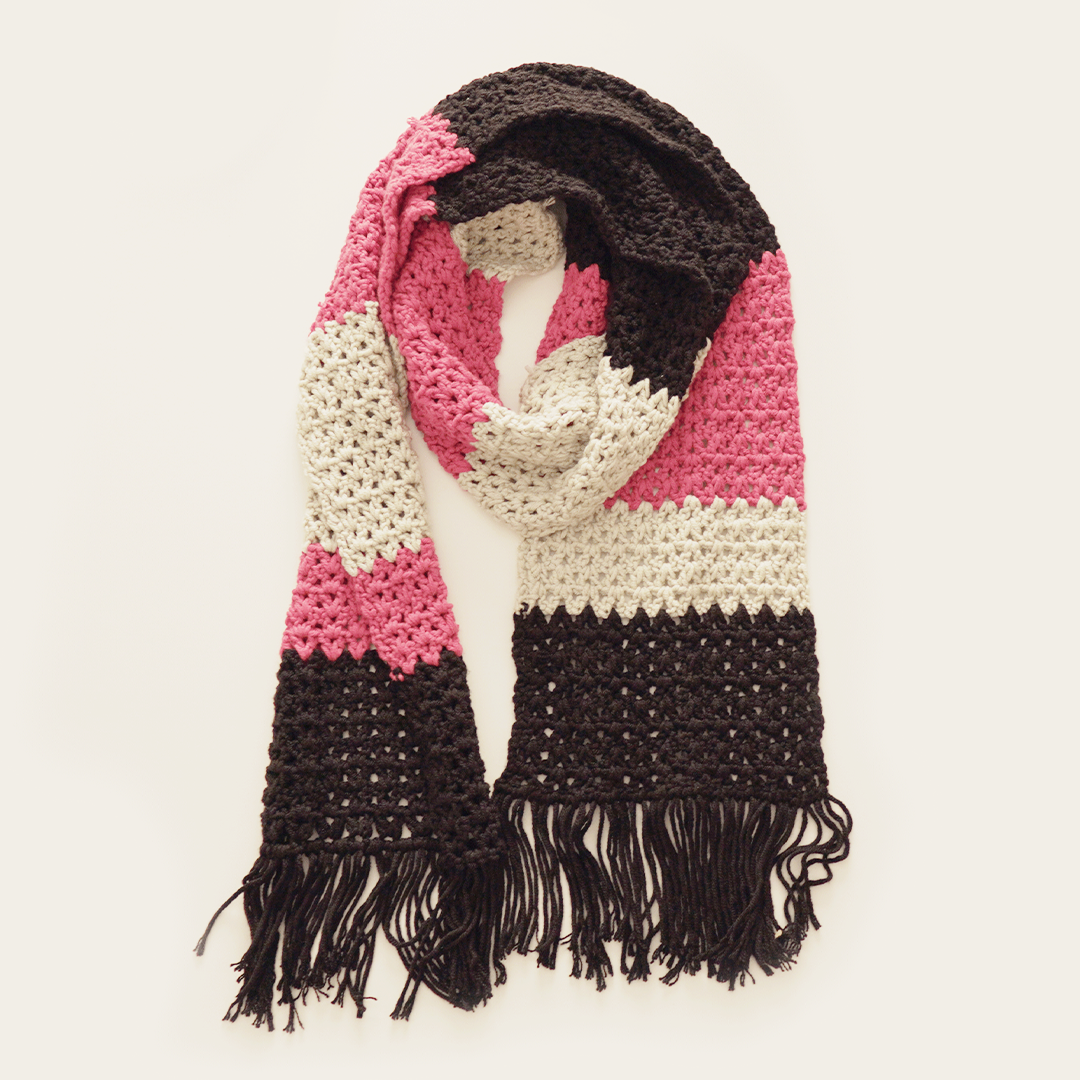
I went back and forth a lot on what to name this piece, but then this name just came to me.. because the piece is brown and white, and while I was making it I was drinking chocolate milk, I made it in winter.. and that’s my favorite winter drink
Insha’Allah you’ll like the video
I hope you’ll give it a like and subscribe to the channel if you haven’t already, and turn on the bell so you get all my new stuff as soon as it’s out
The pattern
Step by step
First, I’d like to tell you that I made two sizes, small and medium; if you’d like to make bigger sizes, just add two chains
For the small size I made 39 chains
For the medium size I made 41 chains
And if you want a bigger size, make it 43 chains
The instructions from here on are for the small size, and I’ll add notes for the medium size
- Front and back piece
The name of the stitch I used, in case you’d like to look it up online
Alpain Stitch
Starting chain: 39 ch
Row 1: skip the first 3 ch, then starting in the 4th ch, 1 dc in each ch to the end .. count: 36 dc + the turning chain = 37 sts
Row 2: turning chain, and 1 sc in each of the next 37 sts.. count: 37 sc
Row 3: change color: make a slip knot, then join the new color to the piece, ch 3 and at the same time hide the first color inside the chains ( watch the video at 3:00 )
skip the first st ( because the turning chain counts as a dc on top of it ), * FPtr in the next st of row 1, then skip the sc behind the treble, dc in the next sc, repeat from ( * ) the asterisk
to the end of the row.. the last st will be a dc, count: 37 sts
Row 4: repeat row 2
Row 5: ch 3, dc in the next sc, skip the next sc, then FPtr around the
dc of row 3, repeat to the end of the row, the last st should be a FPtr around the last
dc of row 3
Now repeat rows 2 to 5 until you reach the length you want
For the medium size I kept repeating until I got to 37 rows, and I ended on a dc row, not a sc row
For the small size I made 33 rows, and again the last row shouldn’t be sc, because we’ll add an extra row later when we finish the piece
A stitch chart I found online
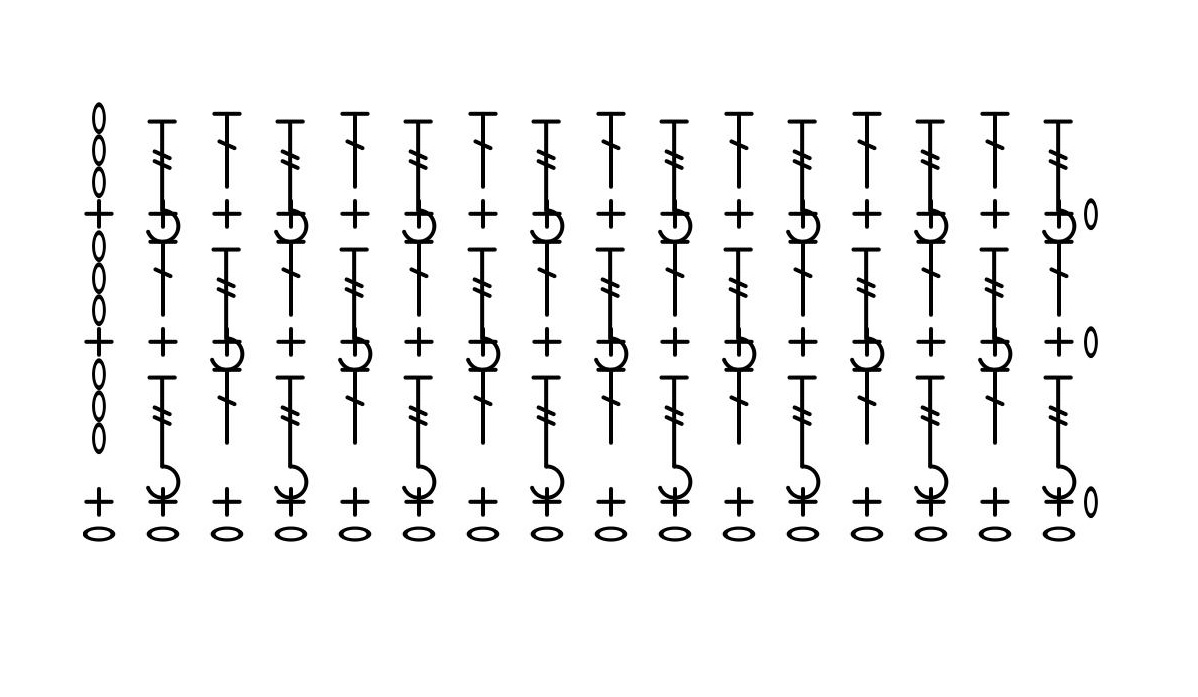
- Now you’ll have an almost rectangular piece; cut the yarn and weave in the ends, then repeat to make a second rectangle, and now it’s time for the sleeves
- Sleeves
Watch ( the video at 5:00 ) to see how I took the sleeve measurements, because they differ from person to person
then come back and continue the instructions here
Here I’ll write the counts I used, but if your measurements are different you can of course decrease or increase the counts
Just like I did in the video ( at 6:30 ), we’ll start working sc along the edge of the piece
in brown
Along the foundation chain we work 2 turning chains ( they count as a sc ), then in every dc we come to we work 2 sc, and in
every sc we come to we work 1 sc
When we reach the end of the piece, we’ll have 52 sc for the small size
and for the medium size we’ll have 58 sc
keeping in mind that the turning chains count as a stitch
Now we start making a cord that connects the two pieces, and here you’ll need to go back to the video ( at 7:30 ) if you don’t know the chainless foundation technique
because we’ll be working sc without chains, and that forms a cord we use to join the two pieces together
For the small size I made 23 sc
and for the medium size I made 33 sc
Then we join the two pieces ( watch the video at 8:14 )
We repeat the same thing on the other side, and when you join the two ends together with the cord, be careful at this stage that the first cord isn’t twisted, because if it is, it’ll ruin your work and you’ll have to start all over again
( watch the video at 9:45 ) Now we change to white and start working the moss stitch
Moss Stitch
If you don’t know how to make it, here’s an old video where I explained it in detail
- For the medium size I made 11 rows
For the small size I made 10 rows
And of course you can add or remove rows as you like, but this is what worked for me
( watch the video at 10:41 ) After that, on each side we work two full rows of hdc
- Neckline
For the neckline we work hdc in every stitch, and in the corners we work a 4-stitch decrease; it’s better to watch the video, it’s much clearer ( watch the video at 10:16 )
We’re done with the main piece, and now we start making the ties
- Ties
We’ll make the ties with the chainless technique I explained earlier ( watch the video at 11:40 )
When we’re done, we’ll have a tie at each of the four corners of the piece
– The finished piece –